I once made a pair of crochet slippers so beautiful I photographed them before I tried them on. Rainbow granny squares. Cream edging. A little pom-pom on the ankle. They looked like something a fairy godmother would wear to brunch. Then I put them on. The sole was two millimeters thick. I could feel every floorboard in my apartment through the yarn. After three steps, I understood why people say handmade slippers are decorative. I wore them for exactly one evening, then hid them in a drawer where beautiful failures go to die.
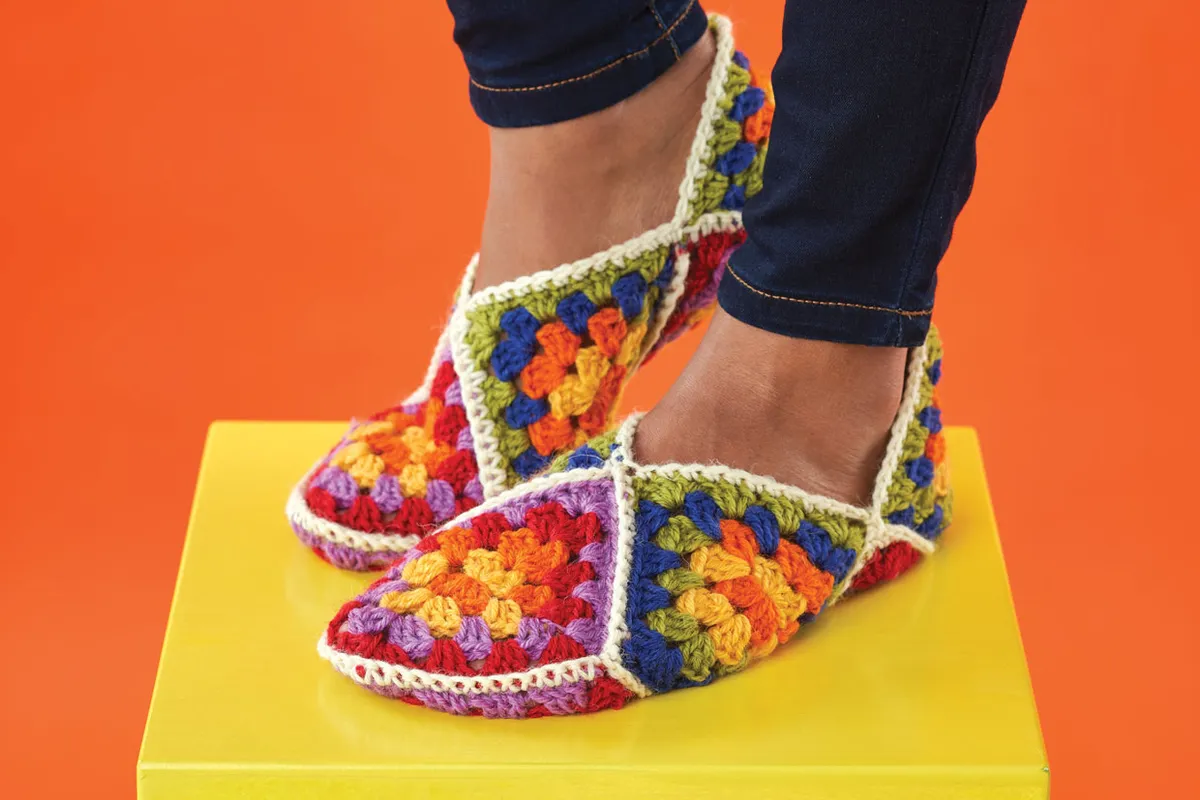
That pair taught me the single most important rule of crochet slippers: if the sole is an afterthought, the slipper is a decoration.Before we begin, let me save you from the mistake I made. Most crochet slipper patterns focus on the decorative part — the granny squares — but almost ignore the sole. And that is exactly why so many handmade slippers end up sitting on a shelf instead of on your feet. The good news? A pair of granny square slippers with a proper sole takes 4 to 6 hours, costs less than a latte at a fancy café, and will outlast every store-bought pair you have ever owned. Below is the exact method — with real stitch counts, real yardage, and the one structural trick that separates slippers you display from slippers you live in.
Common Crochet Slipper Mistakes
Before we pick up the hook, let us talk about what goes wrong. Because almost every failed slipper I have made — and I have made many — failed for one of these three reasons.
The Sole Is Too Thin
A single layer of crochet fabric is roughly 3 to 5 mm thick. That is fine for a dishcloth. It is not fine for a foot that will press against hardwood, tile, or cold concrete. Without padding, you feel everything. And within two weeks, the sole felts into a flat, dirty pancake.The fix: Crochet the sole in two layers — an outer sole in sturdy yarn and an inner sole in soft yarn — then work the upper directly into the edge of the doubled sole. This gives you 8 to 10 mm of cushioning without needing to sew on a separate insole.
The Opening Is Too Wide
A slipper that gapes at the ankle is a slipper that slides off when you walk. I have seen beautiful granny-square slippers ruined by a loose cuff that refuses to grip. The foot needs to feel held, not swimming.The fix: Work the ankle cuff in front-post and back-post double crochet — a ribbed stitch with natural elasticity. It hugs the ankle without elastic, without buttons, and without the fuss of drawstrings.
The Yarn Is Wrong
I made my first pair in 100% cotton because the colors were irresistible. Within a month, the cotton had stretched, the shape had gone rectangular, and the slippers looked like sad oven mitts. Cotton has no memory. Wool has memory. Acrylic has memory. Cotton just gives up.The fix: Use a wool-acrylic blend (70/30 or 80/20) or pure wool. The fiber must be able to spring back into shape after being squashed by a foot.

Materials You Need
- Yarn: Worsted-weight wool-acrylic blend, approximately 150 to 180 meters total (about 1.5 to 2 skeins of 100 m yarn). You will use roughly 40 m for the sole, 80 m for the two granny squares, and 30 to 40 m for the cuff and edging.
- Hook: 4.5 mm (US 7) for the main work, 4 mm (US G) for the ribbed cuff if you tend to crochet loosely.
- Stitch marker: One, for marking the start of rounds.
- Tapestry needle: For weaving in ends and joining.
- Optional: Felt insole and faux leather sole pads for extra comfort.
Gauge: 12 double crochet stitches × 7 rows = 5 cm × 5 cm (2 in × 2 in). If your gauge is off, the slipper will be too large or too small. Make one test square before committing.
Yarn: Worsted-weight wool-acrylic blend, approximately 150 to 180 meters total (about 1.5 to 2 skeins of 100 m yarn). You will use roughly 40 m for the sole, 80 m for the two granny squares, and 30 to 40 m for the cuff and edging.
Hook: 4.5 mm (US 7) for the main work, 4 mm (US G) for the ribbed cuff if you tend to crochet loosely.
Stitch marker: One, for marking the start of rounds.
Tapestry needle: For weaving in ends and joining.
Optional: Felt insole and faux leather sole pads for extra comfort.
The Granny Squares
Each slipper uses two granny squares joined at the toe. The squares should measure approximately 10 to 11 cm (4 to 4.5 in) per side.Round 1: Chain 4. Join with a slip stitch to form a ring. Chain 3 (counts as first double crochet), work 2 double crochet into the ring, chain 2, work 3 double crochet into the ring, chain 2 — repeat from * three more times. You now have four clusters of 3 double crochet, separated by chain-2 spaces. Join with a slip stitch to the top of the starting chain-3.Round 2: Slip stitch into the next chain-2 space. Chain 3, work 2 double crochet into the same space, chain 2, work 3 double crochet into the same space (this forms the first corner). Chain 1, work (3 double crochet, chain 2, 3 double crochet) into the next chain-2 space — repeat from * around. Join with a slip stitch.Round 3: Slip stitch to the next corner space. Chain 3, work (2 double crochet, chain 2, 3 double crochet) into the same corner space. Chain 1, work 3 double crochet into the next chain-1 space, chain 1, work (3 double crochet, chain 2, 3 double crochet) into the next corner space — repeat from * around. Join.Round 4: Repeat Round 3, working 3 double crochet into each side space and (3 double crochet, chain 2, 3 double crochet) into each corner. After Round 4, your square should measure 10 to 11 cm. Fasten off, leaving a 20 cm tail for sewing.For colorwork: Change colors at the start of each round for the classic rainbow effect. Weave in ends as you go — a granny square with six loose tails on the back is a misery to finish later.
The Doubled Sole
The sole is worked as an oval in continuous rounds, then folded double for thickness.With the 4.5 mm hook and your sole color, chain 13.Round 1: Work 2 half-double crochet in the second chain from the hook. Half-double crochet in each chain across to the last chain. Work 5 half-double crochet in the last chain. Rotate to work along the opposite side of the chain. Half-double crochet in each stitch across to the last stitch. Work 3 half-double crochet in the last stitch. Do not join — place a stitch marker in the first stitch and work in continuous spirals.Round 2: Work 2 half-double crochet in each of the next 2 stitches, half-double crochet in each stitch across to the corner, work 2 half-double crochet in each of the next 5 stitches, half-double crochet across, work 2 half-double crochet in each of the next 3 stitches. You now have a firm oval approximately 24 cm long and 9 cm wide — roughly the shape of a foot without toes.Round 3: Half-double crochet in each stitch around, working 2 half-double crochet in the center stitch of each curved end. You should now have approximately 44 stitches total.Fold the sole in half along its length, wrong sides together. The fold creates a double layer. You will work the upper directly into the edge stitches of this folded sole.
Assembly
Take two granny squares. Place them side by side, overlapping by approximately 3 cm at one corner — this forms the toe. Sew the overlap with whip stitch using your tapestry needle. This joined pair now forms the front upper of the slipper.Attach the yarn at the center back of the folded sole. Single crochet evenly around the entire edge of the doubled sole, working through both layers. You should have approximately 40 to 44 single crochet stitches.Round 1 of upper: Single crochet in each stitch around.Round 2: Attach the joined granny squares to the front half of the sole edge. Hold the squares against the sole with the toe pointing forward. Single crochet through both the sole edge and the corresponding stitch of the granny square, working across the front 20 to 22 stitches. When you reach the side edges of the squares, stop attaching and single crochet in the remaining sole stitches only. This leaves the back of the slipper open for the heel.Round 3 to 6: Single crochet in each stitch around, decreasing 1 stitch at each side of the heel opening every other round. This gradually shapes the heel cup.
The Ribbed Ankle Cuff
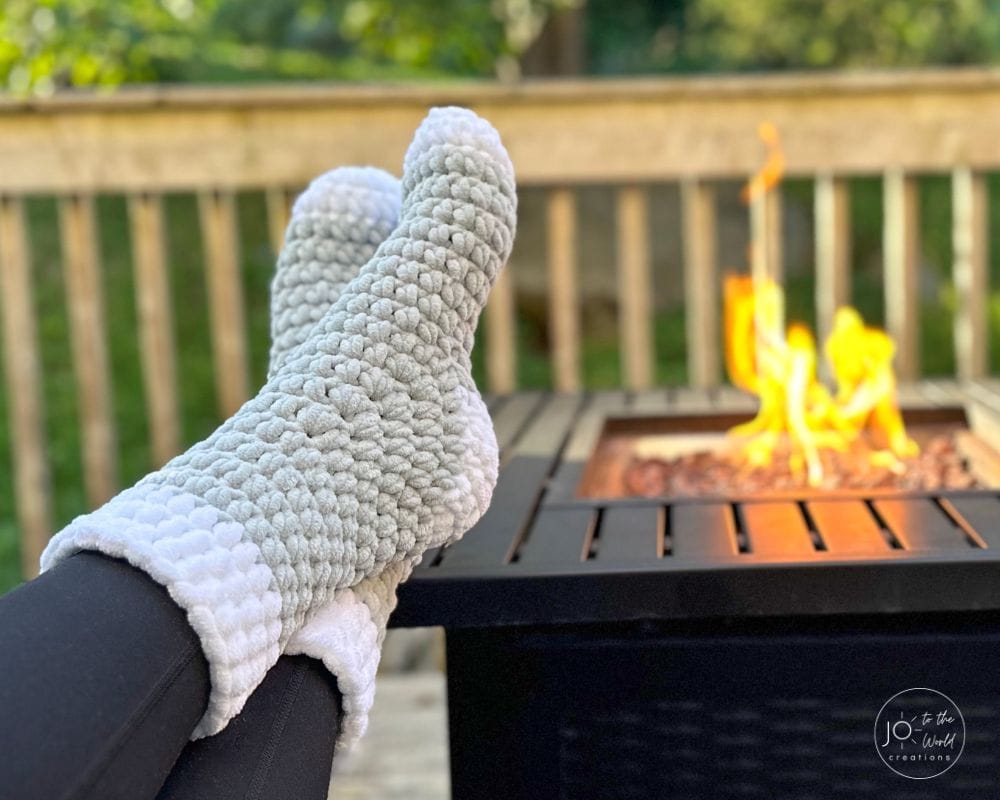
The cuff is what keeps the slipper on your foot. Worked in ribbed stitches, it hugs the ankle without feeling tight.Round 1: With the right side facing, attach yarn at the back center of the heel opening. Chain 2. Work front-post double crochet around the next stitch, back-post double crochet around the next. Alternate FPDC and BPDC around the entire opening. Join with a slip stitch.Rounds 2 to 8: Chain 2. Work FPDC around each FPDC from the previous round, and BPDC around each BPDC. This creates a vertical rib with natural stretch. After 8 rounds, the cuff should measure approximately 8 to 10 cm tall (3 to 4 in).Final round: Work a round of single crochet for a clean edge. Fasten off and weave in all ends.
Sizing Tips
I am not going to drown you in charts. Here is how to adjust this pattern for any foot.For a smaller foot (EU 35–37 / US 5–7): Make the granny squares through Round 3 only (not Round 4). Work the sole to 22 cm long instead of 24 cm.For a larger foot (EU 41–43 / US 9–11): Work the granny squares through Round 5. Increase the sole to 26 cm long and add 2 extra increase stitches at each end of Round 2.For a high instep: Work 2 extra rounds of single crochet on the upper before starting the ribbed cuff. This adds height over the bridge of the foot.For a wider ankle: Use a 5 mm hook for the cuff rounds only, or work 2 extra rounds of ribbing.
The Secret to Comfortable Slippers
There is one detail that separates slippers you tolerate from slippers you reach for every morning: the insole.After you have finished the slipper, cut a piece of thick felt or fleece to the shape of the inner sole. It should be slightly smaller than the crocheted sole so it does not bunch at the edges. Hand-sew it to the inside using matching thread and a simple running stitch around the perimeter.This felt layer does three things: it adds cushioning, it absorbs moisture, and it prevents the crocheted sole from felting against your bare foot. A slipper with a felt insole feels like a real shoe. A slipper without one feels like a sock that gave up.
How Long Does This Actually Take?
Here is the honest breakdown from someone who has made dozens of pairs:- Granny squares (4): 2 to 2.5 hours, including color changes and weaving ends
- Soles (2): 45 minutes to 1 hour
- Joining and upper: 1 to 1.5 hours
- Ribbed cuffs (2): 45 minutes
- Felt insoles and finishing: 20 minutes
Total: 5 to 6 hours for the pair. Not a weekend project. Not an hour. A satisfying evening and a morning. The kind of time that makes you appreciate them when you slide your feet in.
Granny squares (4): 2 to 2.5 hours, including color changes and weaving ends
Soles (2): 45 minutes to 1 hour
Joining and upper: 1 to 1.5 hours
Ribbed cuffs (2): 45 minutes
Felt insoles and finishing: 20 minutes